How to Make Hay on a Small Property: Cut, Ted, Rake, Bale
A step-by-step guide to making your own hay on a few acres — when to cut, how long to wilt, how to tell it is ready, and the gear that gets it into the shed.
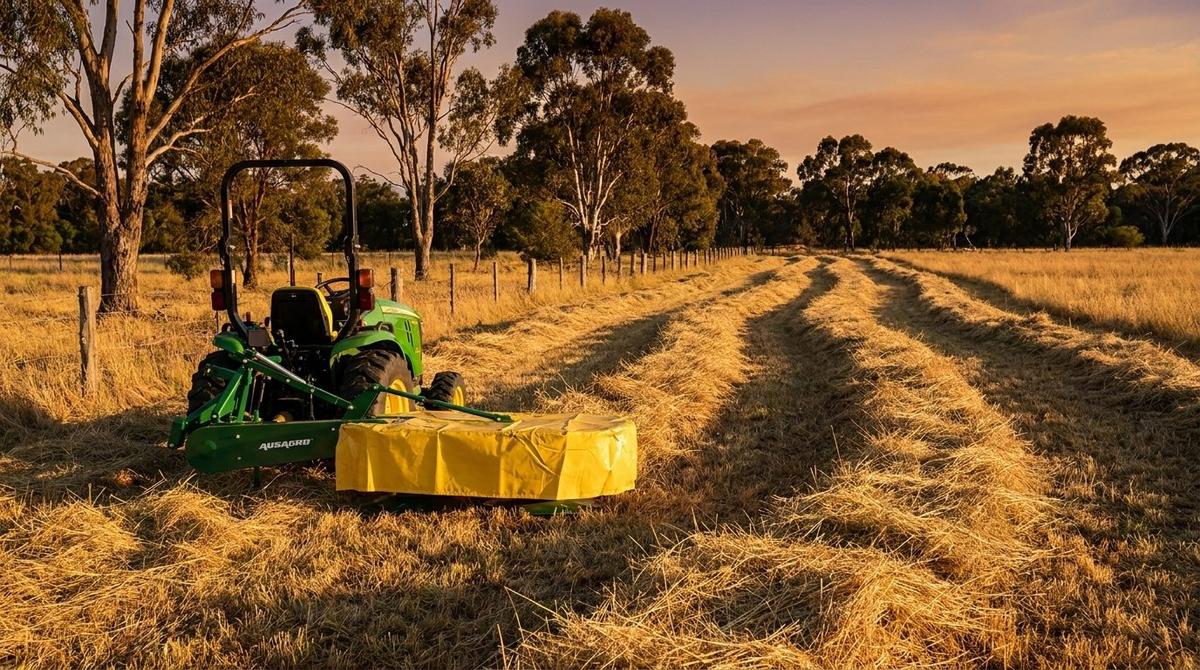
If you run a few acres and buy hay in every year, you already know the sting: the price goes up every drought, the quality is a lottery, and the good stuff sells out first. Making your own is very achievable on a small block. You do not need a broadacre contractor's kit — you need a compact tractor, four operations, and a bit of weather patience.
Here is the whole job, start to finish.
1. Pick your window before you pick up a key
Hay is made by the weather, not the machine. You want three to four clear, low-humidity days after cutting. Check the forecast, then check it again the morning you plan to cut. A shower on wilting hay leaches sugar and colour; a shower on baled hay can mean mould in the shed.
Cut in the morning once the dew has lifted. Hay cut with dew still on it wastes half a day just losing surface water.
2. Cut at the right growth stage
For most pasture and grass hay, cut at early head emergence — before the seed head fully opens. For lucerne, cut at early bud to about 10% bloom. Cut later and you get more bulk but coarser, stemmier feed with lower protein. Cut earlier and you get beautiful feed but noticeably less of it.
Leave a stubble of 5–8 cm. Cutting too low picks up dirt and ash, damages the crown of the plant, and slows regrowth.
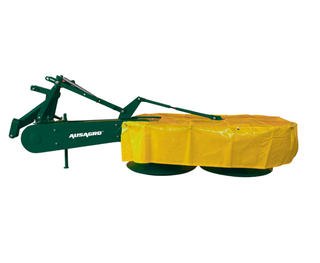
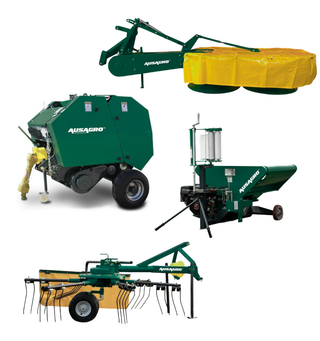
Our Drum Mower — 1.65 m covers a 6 ft swath at around 5 km/h on a 540 rpm PTO, which is a comfortable pace for paddock work on a small block.
3. Ted it out to speed up drying
Tedding spreads the cut swath across the full paddock width so sun and air reach the whole crop instead of just the top of the windrow. On a heavy cut, tedding within a few hours of mowing can pull a day off your drying time — and a day is often the difference between making hay and making a mess.
Ted in the heat of the day when the crop is dry on the surface. Tedding wet, heavy material just rolls it into ropes.
4. Rake it back into a windrow
Once the crop is close to baling moisture, rake it back into an even windrow sized to your baler's pickup. This is the step people rush, and it is the step that decides how well the baler feeds.
Rake in the cool of the morning if you can, when the leaf is slightly tougher and less likely to shatter — especially important with lucerne, where the leaf is where the protein lives.
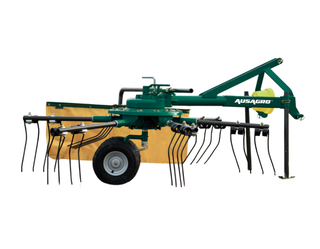
The 2-in-1 Rotary Rake-Tedder — 2.5 m does both jobs off one 20–65 hp tractor, which saves a small operation from owning two implements.
5. Test the moisture before you bale
This is the single most important check in the whole process. Small round bales want to be baled at roughly 15–18% moisture. Too wet and the bale heats, moulds, and in bad cases becomes a genuine fire risk in a closed shed. Too dry and the leaf shatters and you lose the best of the feed on the ground.
If you do not have a moisture meter, the old field tests still work:
- Twist test. Twist a handful of stems hard. If sap appears or the stems feel rubbery and bend rather than snap, it is too wet.
- Scrape test. Scrape a thick stem with a thumbnail. If the outer skin peels away in a strip, there is still moisture in it.
- Sound test. A handful of ready hay rustles and crackles. Ready hay sounds dry before it looks dry.
A moisture meter costs less than one spoiled stack. Buy one.
6. Bale, then let the bales sweat
Bale in the afternoon once the crop has dried down, and stop when the evening dew starts coming back — dew-damp hay going into a bale is the classic beginner mistake.
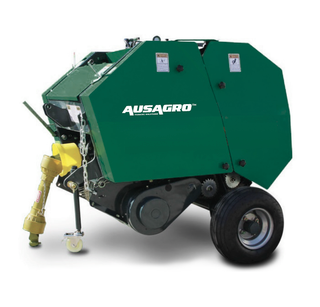
Our Mini Round Baler — 60 × 70 cm makes 25–35 kg bales at 80–100 bales per hour off a 20–65 hp tractor. That size is deliberate: a small round bale can be moved by one person, fed out by hand, and sold to horse owners who cannot handle a full-size round.
Leave fresh bales out of the stack for a day or two so they can finish sweating, then store them off the ground and under cover with air able to move between the rows.
What it takes to get set up
A complete small-property hay run needs four things: a mower, a tedder or rake, a baler, and twine or net. If you are buying piece by piece, start with the baler — it is the machine that turns standing grass into something you can store and sell.
If you would rather do it in one go, the Hay Maker Package bundles the mower, rake-tedder and baler as a matched set, which also avoids the classic problem of a windrow that is the wrong width for your pickup.
Common first-season mistakes
- Cutting on a hopeful forecast. Three clear days or do not cut.
- Baling at lunchtime. The crop is usually not down to moisture yet.
- Windrows too wide or too lumpy. Uneven feed is the number one cause of a baler blocking.
- Stacking hot bales tight against a wall. Give them air for the first week.
- Skipping the pre-season service. A snapped belt on day two of a four-day window costs you the whole cut.
Get the weather right and the rest is mechanical. Most people who make their own hay say the same thing after the first season: the machines were the easy part.
Related reading: Mini round baler buyer's guide · How much tractor do you need to run a mini baler?
Not sure which setup suits your block? Get in touch — tell us your acreage and tractor and we will point you at the right combination.
Ready to make your own hay?
Small-farm balers, mowers and rakes built for acreage and hobby farms — delivered right across Australia, backed by a 12-month warranty and local service.
More guides
- How-tos5 min readHay Season Checklist: Servicing Your Baler, Mower and Rake Before You Cut
- How-tos4 min readTwine vs Net Wrap: Which Is Right for Small Bales?
- How-tos4 min readHow Much Tractor Do You Need to Run a Mini Baler?